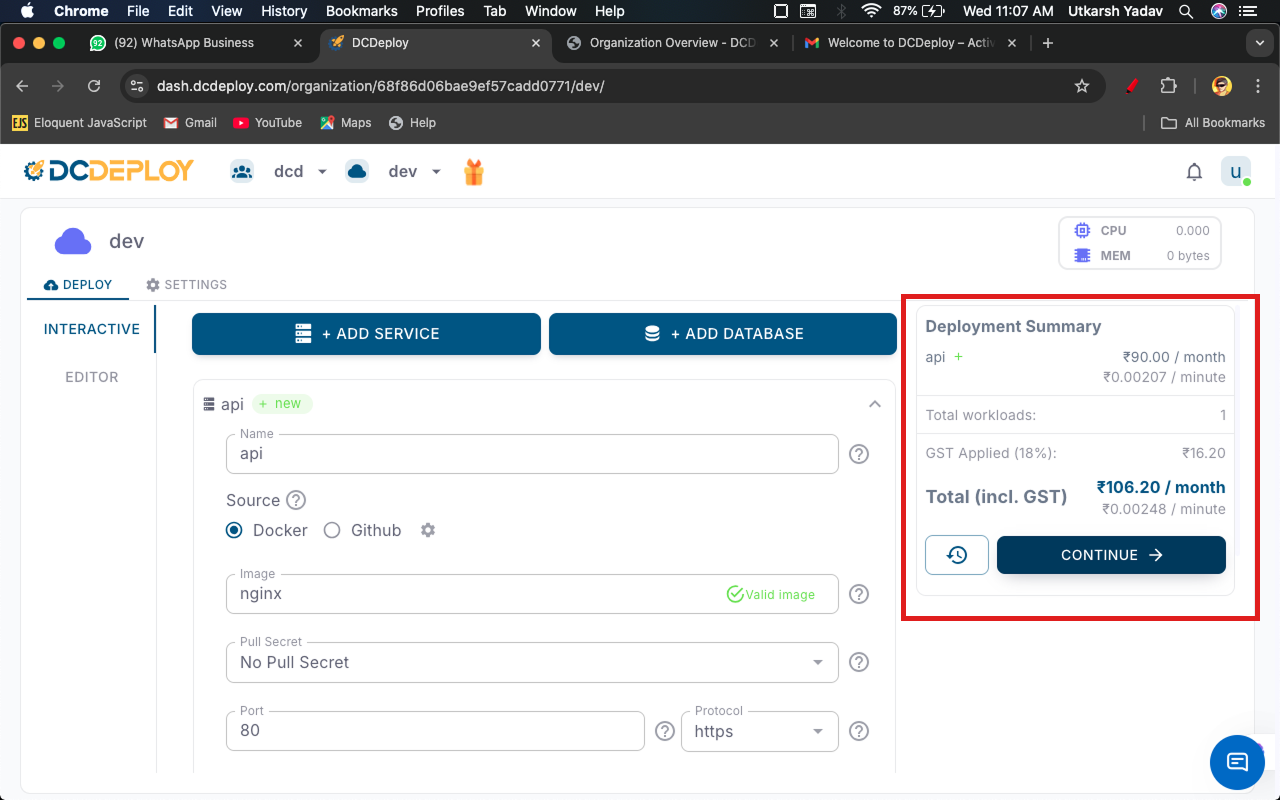
Navigate to Deploy tab
Navigate to the Deploy tab of the environment in your DCDeploy dashboard where you want to deploy your service.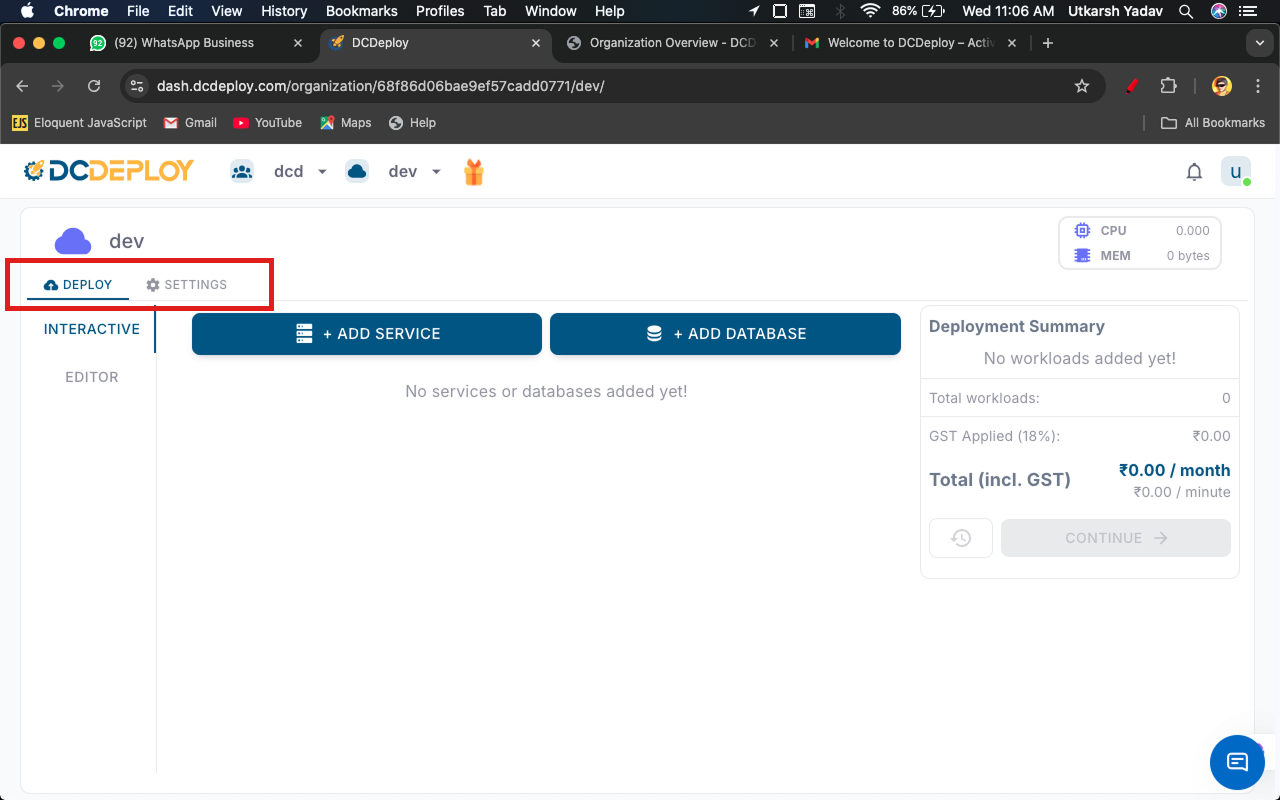
Add a new service
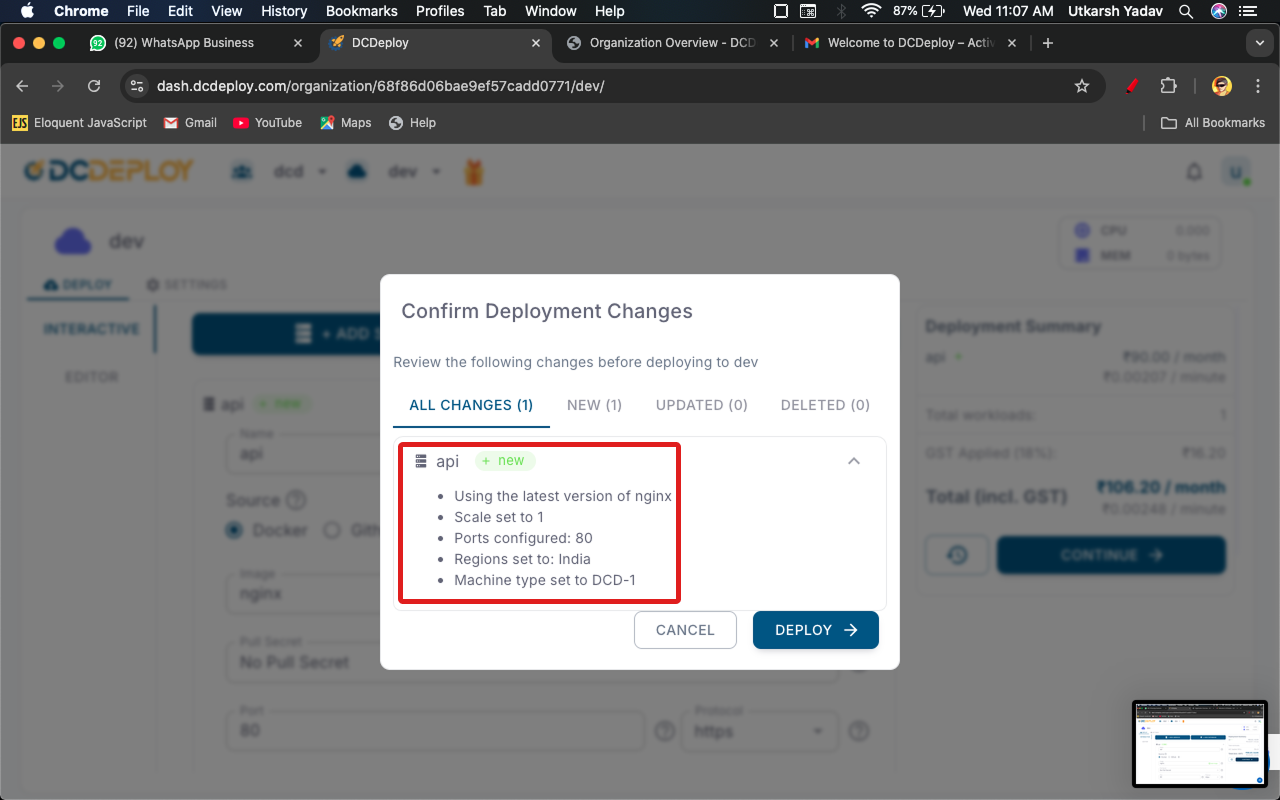
Click on Add Service. A new form will appear where you can provide details of your service.
Fill in the details
- Private repository
- Public repository
Complete the following fields: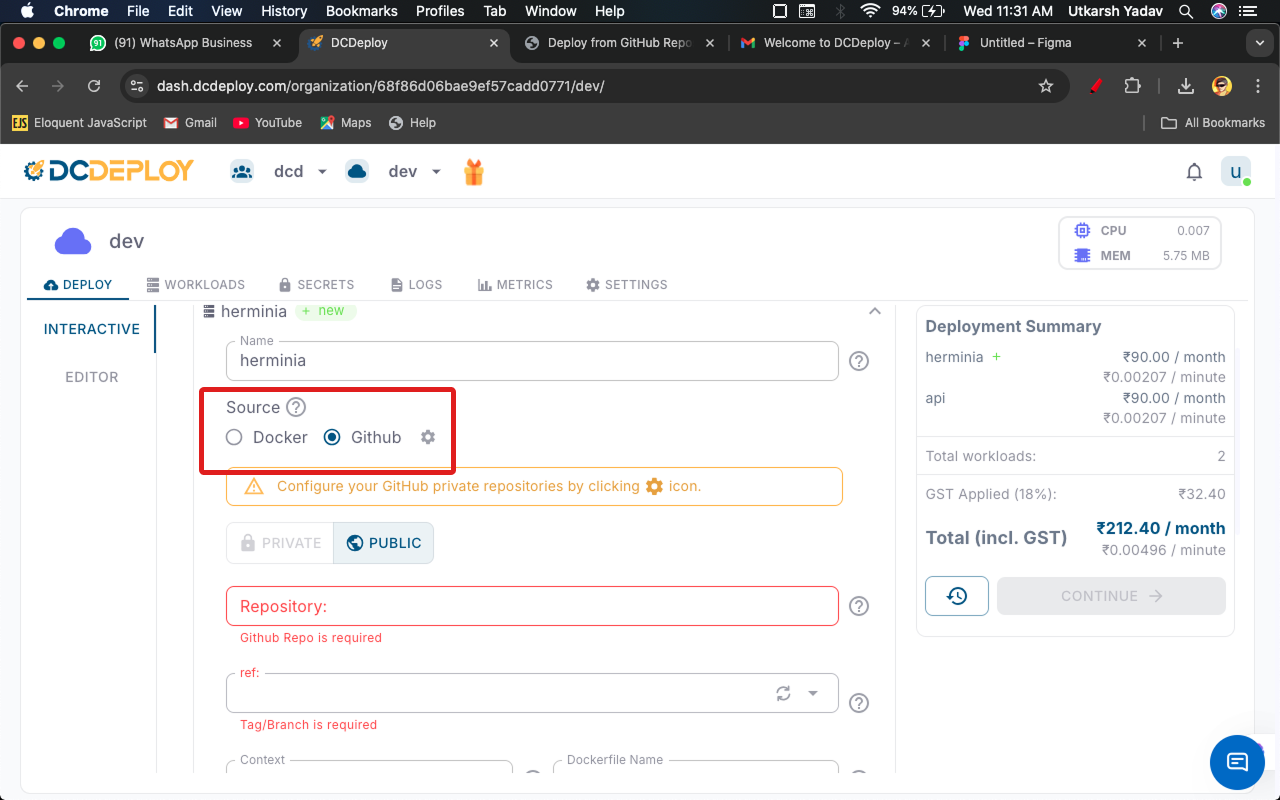
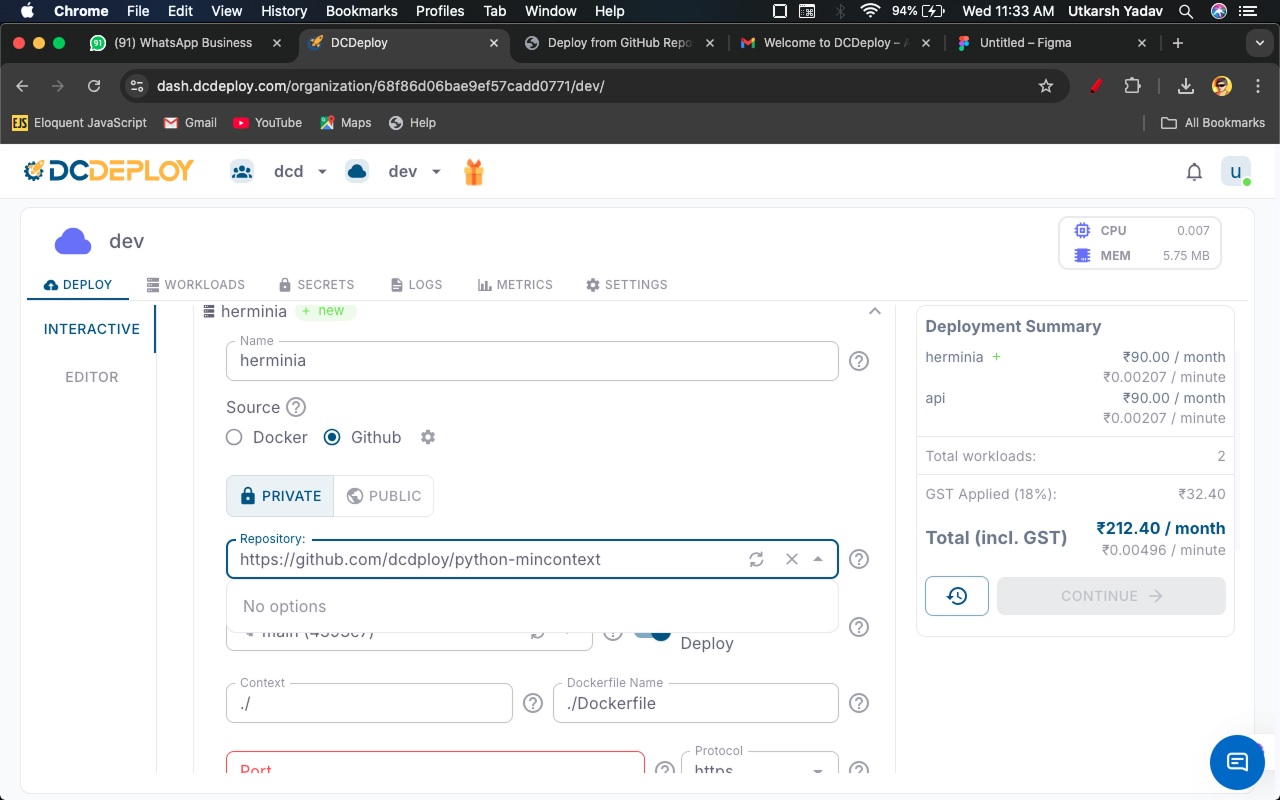
- Service Name: A unique name is auto-generated by default. You can change it if needed.
- Source: Select GitHub as the source.
-
Configure github account, there are two way to Configuration
- Click on user profile icon top right at navbar
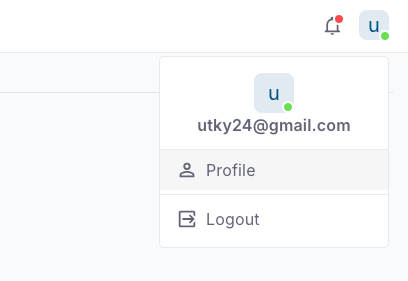
- Click on profile option
- navigate to connection tab
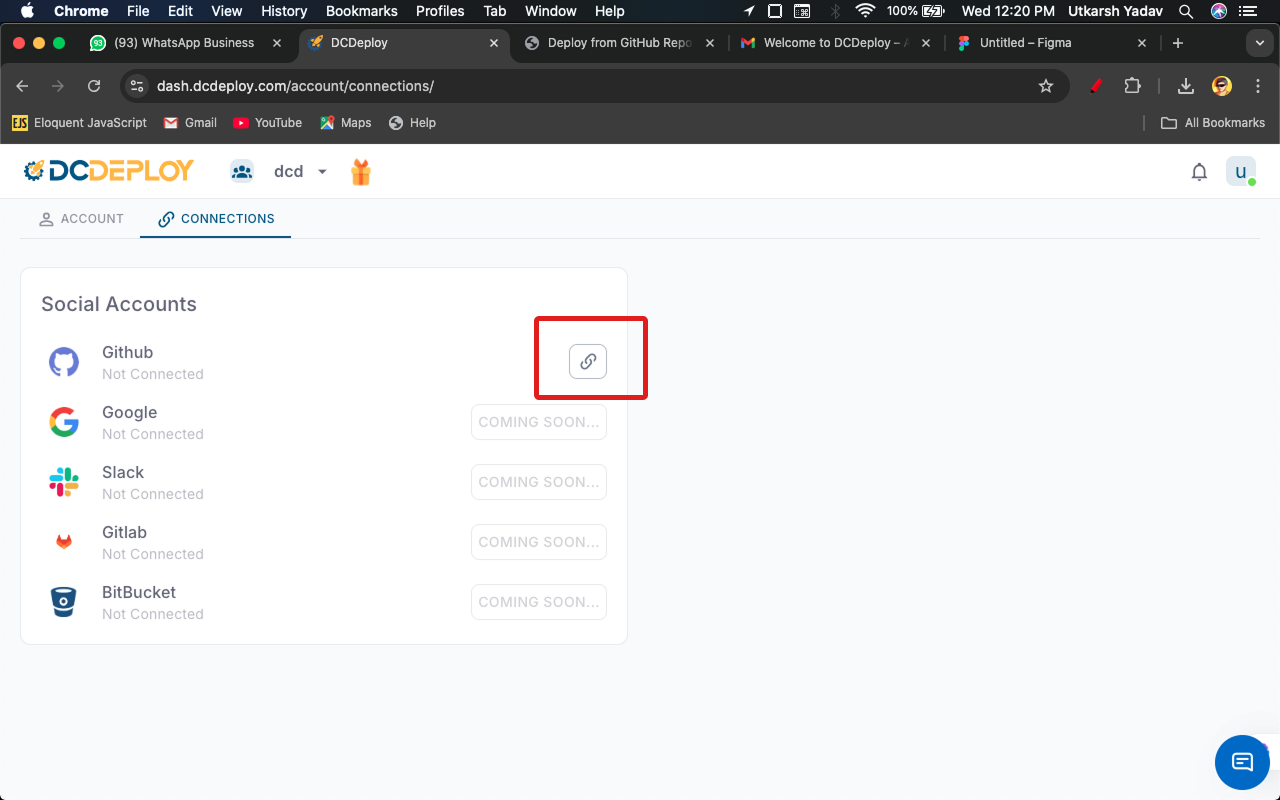
- and connect your github account
OR in your service form - Click on cog icon right side of the github
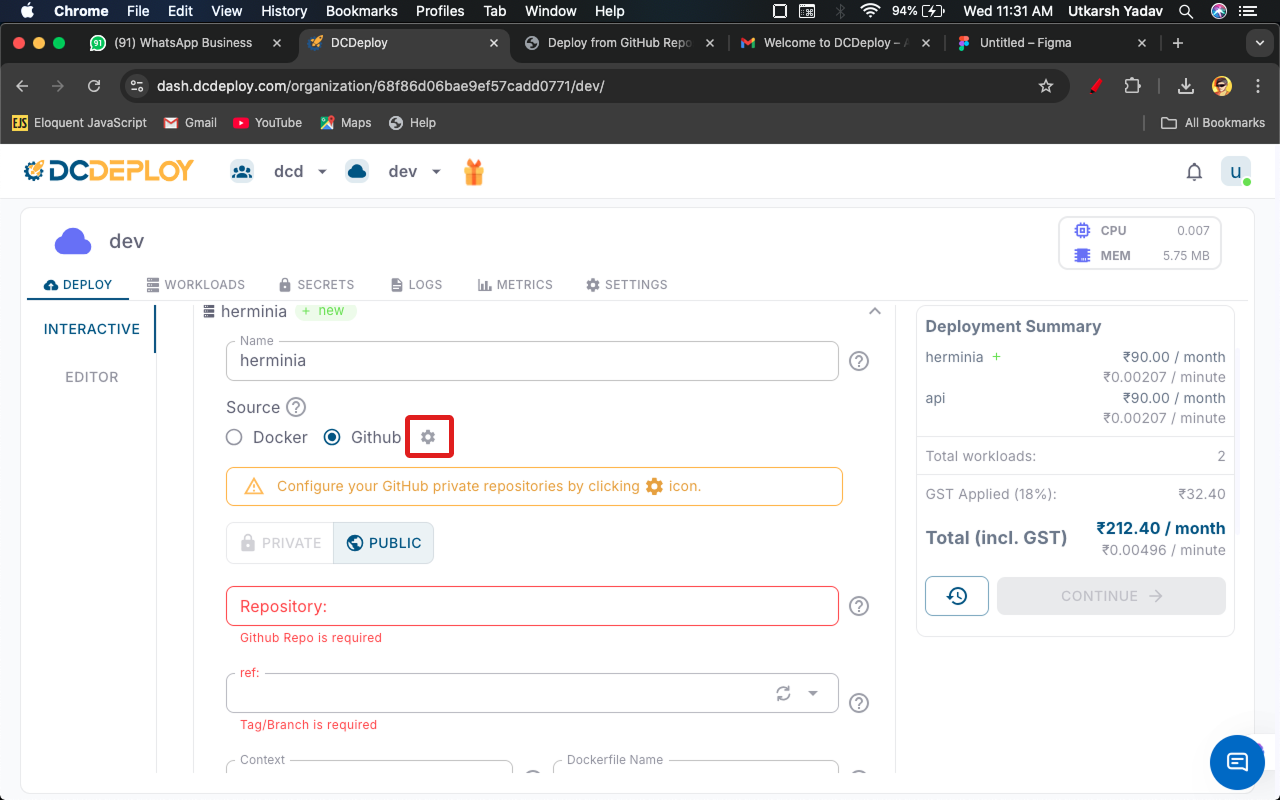
- Select the account you want to configure
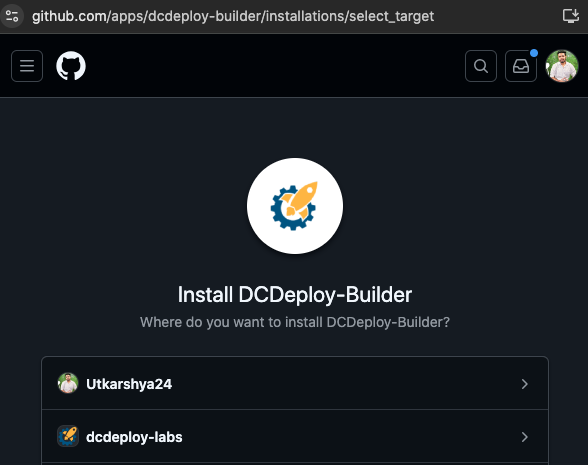
- Select the repository you want to deploy or allow all
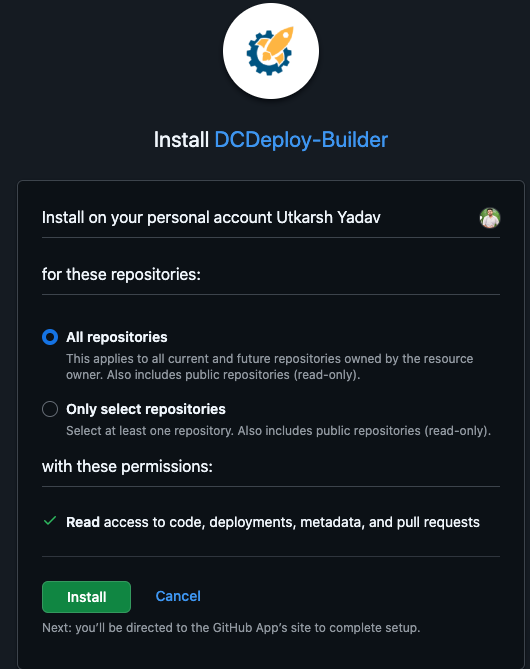
- Click on install
- Repository: Choose the GitHub repository you want to deploy

- Branch / Tag: Select the branch or tag you want to deploy from.
- Build Context: Provide the path in your repo where the Docker build should run (default is
./). - Dockerfile Path: Specify the Dockerfile path if it’s not in the root directory (default is
./). - Auto Build (Optional): Enable auto-build to automatically trigger a new build whenever you push to the selected branch.
Configure runtime settings
Configure how your service should run:
- Port: Enter the port number your service listens on. Ensure your app binds to
0.0.0.0on this port. - Protocol: HTTPS is the default protocol.
- Region: Select the DCDeploy region(s) where you want your service deployed.
- Machine Type: Choose from available DCDeploy machine types (CPU, RAM, and Disk). See details here.
- CPU/Memory Usage Limits: Configure resource limits according to your service requirements.
- Environment Variables: Provide environment variables directly paste your
.envfile or add manually. - Scaling Options:
- Define minimum and maximum instances.
- Enable Auto Scaling to automatically scale based on traffic or CPU/memory thresholds.